CI and GitHub Actions
Deno Deploy's Git integration enables deployment of code changes that are pushed to a GitHub repository. Commits on the production branch will be deployed as a production deployment. Commits on all other branches will be deployed as a preview deployment.
There are two modes of operation for the Git integration:
- Select your organization name, and repository. If your repository or organization does not show up, make sure the Deno Deploy GitHub App is installed on your repository.
- Select a production branch. Code deployed from this branch will be deployed as a production deployment instead of a preview deployment.
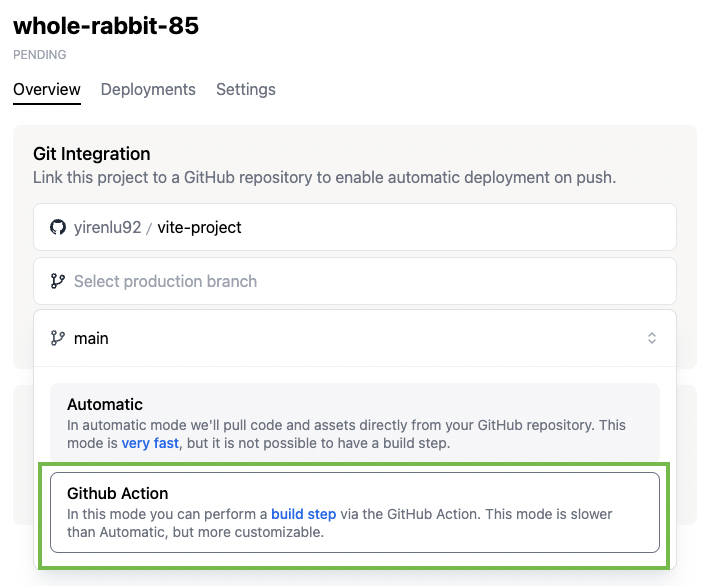
- Choose either Automatic or GitHub Actions deployment mode.
- Automatic: Deno Deploy will automatically pull code and assets from your repository source every time you push, and deploy it. This mode is very fast, but does not allow for a build step. This is the recommended mode for most users.
- GitHub Actions: In this mode, you push your code and assets to Deno Deploy from a GitHub Actions workflow. This allows you to perform a build step before deploying. Below, we go into more detail about the different configurations for Automatic and Github Actions mode.
Automatic
If you select Automatic mode above, you'll subsequently have to select a file in your Github repo as the "entrypoint" file. The entry file is simply the file that Deno will run.
GitHub Action
GitHub Action mode enables you to add a build step to your deployment
process by leveraging the deployctl Github action:
Navigate to
<project-name>project page and select your Github repo under the Git integration card.
Select your branch for the production branch, and in the popup that appears, select Github Action
Click Ok
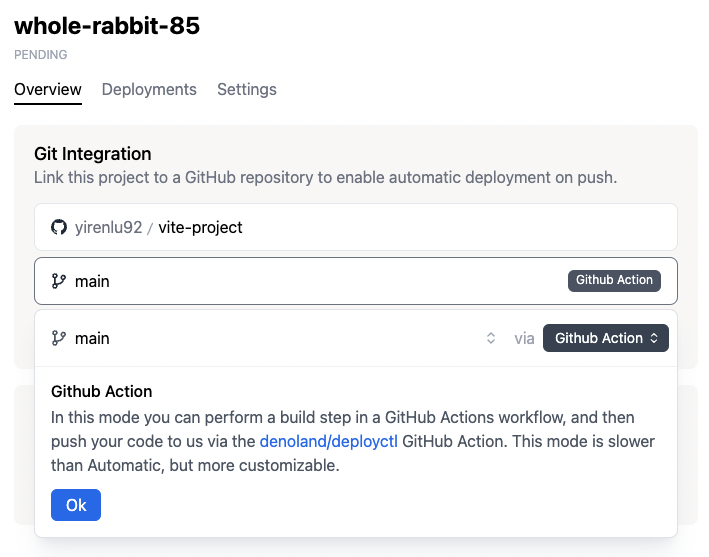
Click Link

This should take you to a next page, where you see a preview of a
deploy.ymlfile that you can download. Download the file and add it to your Github project under.github/workflows/deploy.yml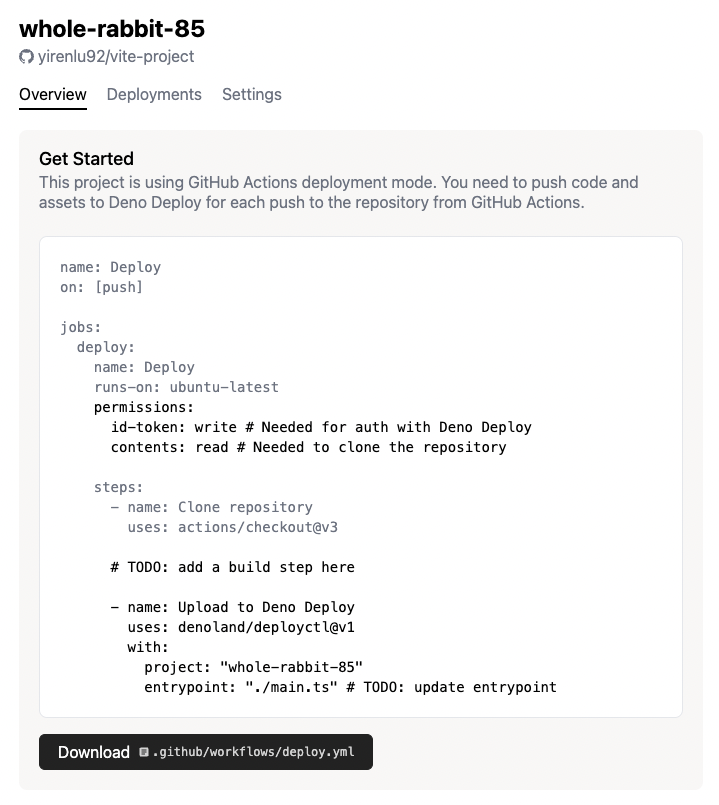
Modify the
deploy.ymlfile as appropriate with your build step, Deno project name, and entrypoint file:job:
permissions:
id-token: write # This is required to allow the GitHub Action to authenticate with Deno Deploy.
contents: read
steps:
- name: Deploy to Deno Deploy
uses: denoland/deployctl@v1
with:
project: my-project # the name of the project on Deno Deploy
entrypoint: main.ts # the entrypoint to deployBy default the entire contents of the repository will be deployed. This can be changed by specifying the
rootoption.- name: Deploy to Deno Deploy
uses: denoland/deployctl@v1
with:
project: my-project
entrypoint: index.js
root: distThe
entrypointcan either be a relative path, file name, or an absolute URL. If it is a relative path, it will be resolved relative to theroot. Both absolutefile:///andhttps://URLs are supported.To deploy the
./distdirectory using the std/http/file_server.ts module, you can use the following configuration:- name: Deploy to Deno Deploy
uses: denoland/deployctl@v1
with:
project: my-project
entrypoint: https://deno.land/std@0.202.0/http/file_server.ts
root: distSee deployctl README for more details.