Deploy a React app with Vite
This tutorial covers how to deploy a Vite Deno and React app on Deno Deploy.
Step 1: Create Vite app
Let's use Vite to quickly scaffold a Deno and React app:
deno run --allow-read --allow-write --allow-env npm:create-vite-extra@latest
We'll name our project vite-project. Be sure to select deno-react in the
project configuration.
Then, cd into the newly created project folder.
Step 2: Build repo
deno task build
Step 3: Create a new Deno project
Navigate to https://dash.deno.com/new and click the +Empty Project button under Deploy from command line.
On the next page, grab the project name, in this case late-goose-47.
Step 4: Deploy the static site to Deno Deploy
There are a couple of ways you can deploy the Vite site to Deno Deploy.
Github integration
The first way is via the Github integration.
Recall that the Github integration has two modes:
- Automatic: Deno Deploy will automatically pull code and assets from your repository source every time you push and deploy it. This mode is very fast but does not allow for a build step.
- GitHub Actions: In this mode, you push your code and assets to Deno Deploy from a GitHub Actions workflow. This allows you to perform a build step before deploying.
Since there is a build step here, you will need to use the Github Actions mode.
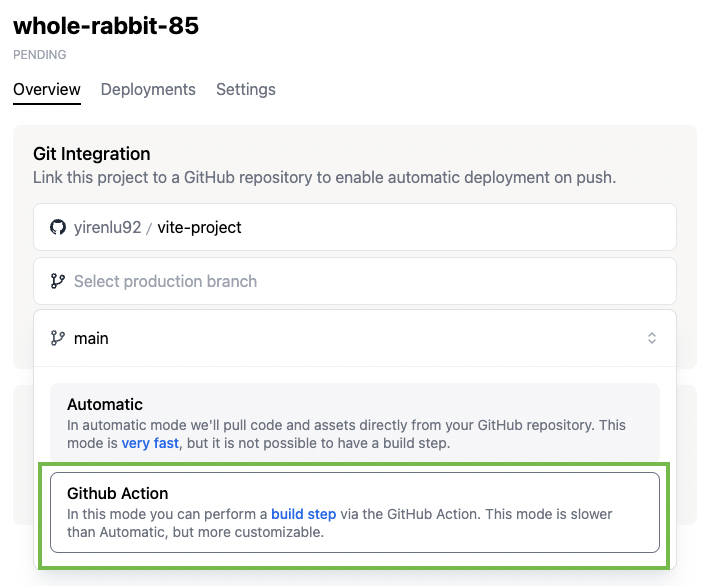
Navigate to
<project-name>project page and selectvite-projectunder the Git integration card.
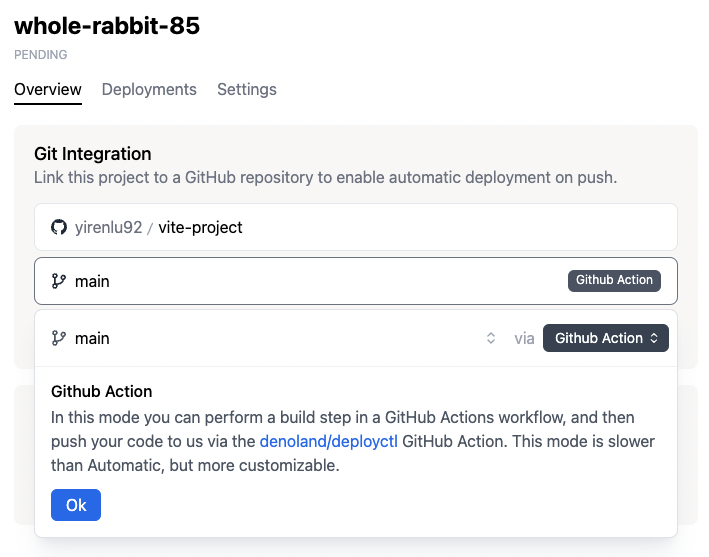
Select your branch for the production branch, and in the popup that appears, select Github Action

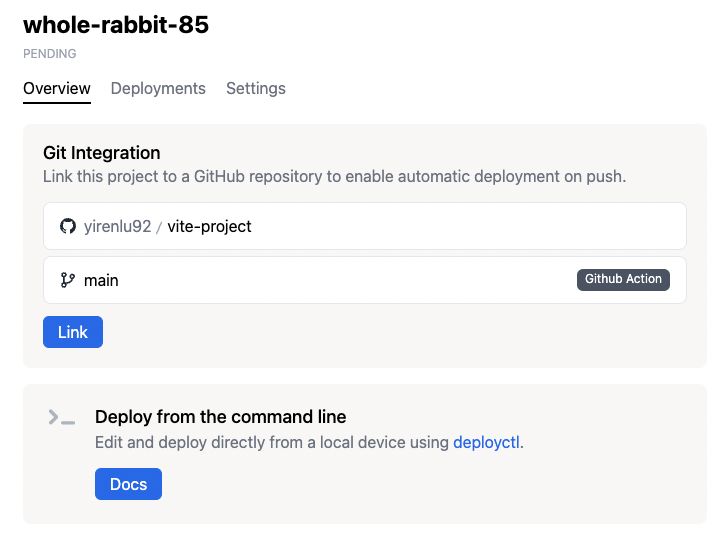
Click Ok

Click Link

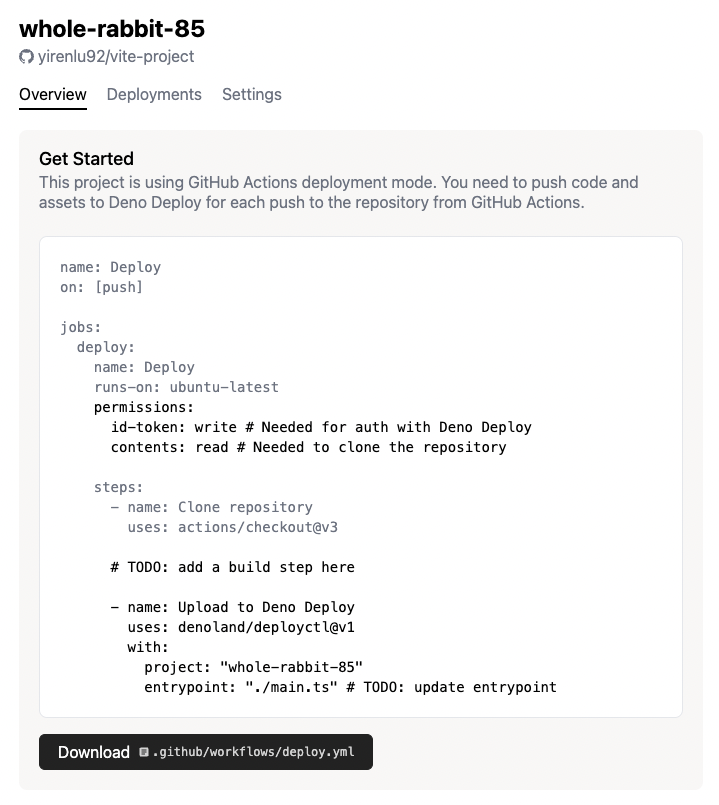
This should take you to the next page, where you will see a preview of a
deploy.ymlfile that you can download. Download the file and add it to yourvite-projectunder.github/workflows/deploy.yml
Modify the
deploy.ymlfile so that it looks like this:name: Deploy
on: [push]
jobs:
deploy:
name: Deploy
runs-on: ubuntu-latest
permissions:
id-token: write # Needed for auth with Deno Deploy
contents: read # Needed to clone the repository
steps:
- name: Clone repository
uses: actions/checkout@v3
- name: Install Deno
uses: denoland/setup-deno@v1
- name: Build
run: deno task build
- name: Deploy to Deno Deploy
uses: denoland/deployctl@v1
with:
project: "<project-name>"
entrypoint: https://deno.land/std@0.202.0/http/file_server.ts
root: distFor this example there are two build steps:
- setting up Deno
- running
deno task build
You will also have to set the entrypoint file to
https://deno.land/std@$STD_VERSION/http/file_server.ts, and the root to/dist.Note that this is not a file that exists in the Vite repo itself. Instead, it is an external program. When run, this program uploads all the static asset files in your current repo (
vite-project/dist) to Deno Deploy. Then when you navigate to the deployment URL, it serves up the local directory.Once the
deploy.ymlfile has been pushed to your Github repo, every time code is pushed to the Github repo, it will also be pushed to Deno Deploy, with the build step run first.
deployctl
Alternatively, you can use deployctl directly to deploy vite-project to Deno
Deploy.
cd /dist
deployctl deploy --project=<project-name> https://deno.land/std@0.202.0/http/file_server.ts